Rawr Engineering
Sunday, May 22, 2011
0 Egg Drop 0
Our design was two air packs surrounding the egg held together with tape. We slowed this down sigtnificantly with a parachute. A suggested achievement for next year would be length of flight time, awarded in steps like size and weight.
Brainstorming
-Create a sketch of one possible solution. Include labels.
-Create a sketch of another possible solution. Include labels.
-Create a sketch of a third possible solution. Include labels.
-Use a decision matrix to justify the approach you chose.
Material Prep
-Generate a list of materials required for build day.
-Document a plan to ensure materials are brought in on block day.
Build Achievements
Material Size:
(your egg is not included in the material size)
(air is ubiquitous and not included in material size. "Rare" commodities like helium are.)
-Your materials fit inside a printer paper box
-Your materials fit inside a shoe box
Material Weight:
(your egg is not included in material weight)
-Your materials weigh less than 500 grams.
-Your materials weigh less than 300 grams.
-Your materials weigh less than 200 grams.
-Your materials weigh less than 150 grams.
-Your materials weigh less than 100 grams.
-Your materials weigh less than 50 grams.
Drop Achievements
Drop Accuracy:
-You hit the butcher paper!
-You hit inside the third ring!
-You hit inside the second ring!
Egg Resilience:
-Your egg didn't break in any way! (awarded three times)
Calculation Achievements
-Describe an aspect of the event using arithmetic.
-Describe an aspect of the event using geometry.
-Describe an aspect of the event using algebra.
-Describe an aspect of the event using calculus.
Thursday, May 19, 2011
Glider Challenge
Tuesday, April 12, 2011
Machine Control Capstone Project
Decision Matrix: Evaluate the four solution ideas using a decision matrix. Determine the best solution to the problem. Final Design Solution: See Blog post pneumatic design for picture of pneumatic design
Design Modifications: At first, we were trying to make a gate system with all pneumatics, but because the whole class was trying to do that as well, it was extremely difficult to find enough parts for everyone. We discovered that we could get the same linear motion job done with motors, so we switched our whole project to this. An exception to the pneumatic requirement was made for our group because of this learning process we went through.
Final Design:
Reflection: We accomplished in making a machine that works decently. Our model went through multiple prototypes. First we tried to use pneumatics and focused most of our energies on this but there were not enough parts so we switched out the pneumatics for motors. We found that motors could do the same motion the pneumatics did just as efficiently and were easier to program. For the most part, our machine worked quite well and achieved the main objective of sorting the marbles. However, the color sensor we used was very sensitive and seemed to vary its readings from day to day. Before each use we had to test our values and adjust accordingly. Only after this could we sort our marbles. However, the design worked quite well after the adjustments. Our other dilemma was getting it below 2 minutes. The machine we designed sorted 15 marbles in approximately 2 minutes and 25 seconds. We were given an exception for this, however. This is because motors work much slower than pneumatics. Regarding our programming, we made a main program with a singular subprogram imbedded in it, as shown above. It was a challenge to program because neither of us had ever made such an intricate program before but we received help from both David Cuban and Austin VonPohle and were able to make a working program. Overall, we believe that we succeeded in making a working program with a efficient machine.
Tuesday, March 22, 2011
Marble sorter with numatics!!!
Tuesday, March 15, 2011
Tuesday, March 1, 2011
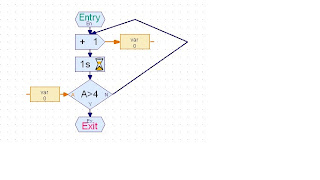
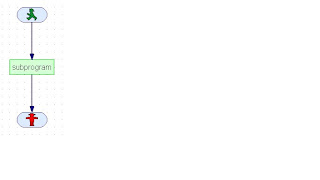
Robo Pro: Subprograms and Meter Displays
Task: Create a program that encapsulates the functionality from our previous lesson within a subprogram (incrementing a variable). Create a Main program that successfully uses your subprogram.
What are the benefits of using subprograms within your team development projects? With subprograms, you can make a more complicated main program more simply than putting it all in the main program screen. This will enable you to make more complex programs without getting confused in a bunch of arrows and seperate programs.